

This How to Sculpt series is a collection of guest articles from Modern Synthesist's Mr_Pink. They are his attempt to demystify the idea of sculpting your own miniatures. It seems that more and more people are taking cracks at it these days as the means of production are getting so very cheap and third-party casting companies are growing like mushrooms. Still, no matter how many head-swap bits are retailed, there is going to come a time when you have an awesome idea for a miniature, and there might not be a compatible, ready-made bit. You're going to have to make it yourself, and it is his belief that the only thing standing in your way is a few helpful tips.
The following is best viewed as a continuation of How to Sculpt 2 as I wasn't exactly sure where you break that article. Now that I've gone over the putties I use and have talked a bit about how to get a bit more out of them, I'll be getting into the nitty gritty of how parts 1 (tools) and 2 (putties) come together.
First off, let's talk about some caveats of working with epoxy putties. There are a few very simple strategies that will allow you to have far more control over your sculpting. Some of them may seem painfully obvious, but if you hold to them, they will go a long way making your sculpting go smoother and to keeping you from messing up things that you've put a lot of time into.
Caveat The First: Lube it Up
As someone commented at the end of the Putty article, one of the most important things to tell someone about working with epoxy putties is that they are STICKY AS HECK. It's not just you. This is a property of the stuff, and if you don't know how to control it, it is absolutely MADDENING. Very early in my sculpting career, someone told me that I should wet my fingers and my tools when working with putty to keep it from sticking. I say this was early in my career, but the reality is, likely, that this tip was were my career started. Once you know to lubricate your tools before endeavouring to sculpt anything, your ability as a sculptor has already increased by about 100% as it is nearly impossible to get anything accomplished with dry tools.
So, the obvious choice for sculpting lube (yes, I'm going to continue to creep you out by referring to it as lube; no, I have never tried using that kind of lube, so get your mind out of the gutter) is water as it is available and cheap. You can keep a pot of it beside your workstation and just dip your fingers/tools into it as needed. Also, if you're using Apoxie Sculpt, water is indispensable as you'll need to wash off the chalky residue that appears early in the Apoxie Sculpt curing process.

Now, though water will treat you nicely, if you're looking to take your SKLLZ to the next level, I'd recommend using some kind of lotion as lube for your tools. Hydra is an advocate of pure Nivea cream, so that is the stuff that I use. Though any kind of moisturizer likely works comparably, I use straight Nivea, from the blue tube/tin, and not any kind of Nivea hand cream that has been diluted/mixed with other stuff.


When applying it to my tools, I tend to dunk my tool in the cream, then wipe off the majority of it on the back of my hand, leaving only a thin skim of cream on the tool. It is always better to have too little than too much as you can always go back to your hand for more.
Added bonus of this practice? The softest knuckles in the world :)
Caveat The Second: Patience Is Your Friend
This is the kind of thing that is hard to tell someone, and you need to learn it through not observing it. I have a particular kind of gaffe that I call "Pulling a Pink." I often exclaim to my norn queen while sculpting "AH {expletive}! I PULLED A PINK AGAIN!", and I do this so frequently that she knows exactly what I'm talking about.
Once you're on a roll with a model, it is so easy to think that you'll do just a little more here, and a little more there, and then you'll put it down to set.


Damn.
So, what I'd recommend, and what I try to hold myself to, is working in small-ish areas on one part of a model at a time, putting it down, and not picking up that model again until it's been at least two hours, and I'm sure the putty has cured. That sounds obvious, but if you hold to it, it will save your models. If you're working in small areas like this, and not trying to sculpt whole swathes of the model in one go, you can get into a kind of assembly-line groove so that while one model is curing, you can be working on the next, and the next, and the next.
Also, if you get something looking perfect on a model, then, for Sky Mother's sake, put. the model. down. Do it now. Honestly. Don't sculpt another scratch. You have got it perfect, and if you continue, you will screw it up. You can go in and sculpt that amazing detail you just dreamed up once your previous amazing work is safely cured :)
Caveat The Third: It's all about LEVELS!
Or, you know, layers.
This is something I learned while sculpting Tyranid carapace plates, and it dovetails nicely after the previous note about having patience. Sculpting successfully, for me, is all about not trying to do too much at once. If you're on a roll, and you can manage it, then, by all means, sculpt an entire model in one go. I, however, have had more success in working in layers. Instead of sculpting an entire model from wireframe right up to the armour in one go, I'll sculpt a skeleton of putty over the wire frame, then add some detail/veins/skin to that skeleton, and then add in some armour or final details on the surface. I do in three stages what you could try to do in one, but because I let the putty set between each stage, I've got a more solid, backing to work against at each level. What's more, when you take your time and work in levels, you have plenty of time to get each level right, and you're not fighting against that ~2 hour curing deadline that the putty sets.
So, back to the example of Tyranid carapace plates. They come in long rows, with each subsequent plate seeming to grow out from under the previous one. When I first tried sculpting long rows of carapace plates, I tried sculpting them all in one go, and they turned out...alright. They certainly weren't great. It was always difficult to apply pressure to flatten and cut straight the edges on a plate without flattening the one under it which was still curing.
This is a specific example, but, more generally, if you try to sculpt models out of massive hunks of putty without having any solid substructure to push/sculpt against, you can often distort other areas of the putty by applying too much force in the area you're focusing on. Further, you can wind up fudging really nice details because you're determined to get them all in before the putty sets on you.
Thus, what I tend to do to alleviate any concerns about distortion is to sculpt in levels or stages. I sculpt in the base level, say, with musculature or organic tissue to get the rough shape/all of the detail even if it will be partially covered, and then I let that layer cure. Once it is set, I return to the same area and sculpt in one armour plate. Then I wait for that armour plate to set, and only once it is done curing to do I go in and sculpt in the armour plate that overlaps the first. This way there is less chance of my screwing up what I already sculpted, and when I'm sculpting in the higher levels, I've got a nice solid surface of cured putty to push against.
I'm not sure if that makes sense in words, so here is an illustration:
You can't really see it, but Mr. Acothyst has already had some rough abs sculpted in, then an armour plate was sculpted in in front of them, and then a second armour plate was added. At each stage I let the putty cure and went off to work on something else before returning to add the next armour plate.


...and shape it into the plate...


Caveat The Fouth: Practice
If your eyes glaze over that title, and you skip onto the next section of the article without reading this, you will never be a decent sculptor. I've mentioned this in a few places before, but I think I should state it here, loud and proud. I am an amateur. I have never been trained to sculpt. I've never taken a course, and when studying art in high school, I was never interested in clays or other sculpting mediums. All of my sculpting experience has come from messing around with epoxy putties and Games Workshop models. The majority of what I've learned, I have learned through trying things, screwing them up, and then having to try them again/come up with a better way to make them work.
One of the most important skills that you need to be a good sculptor is practice. You can't read a series of articles like this or something similar and go from gap filling to sculpting an entire marine in one day. It doesn't make sense. You need to learn things like how much putty is too much putty, or when you've got something right and should stop, or how to keep from leaving fingerprints all over your sculpts. I can try to advise you on these things, but the real way to learn them is in the doing.
I made sure to add this Caveat in because I'm sure many people, emboldened by this series, will try sculpting again, have it not come out perfect, then swear off the entire enterprise in the belief that they "can't sculpt." That may well be the case; perhaps you can't sculpt. However, I, too, couldn't sculpt once, and I assure you that every thing you produce in putty that you think is crap is bringing you one step close to being awesome.
As proof of this, I present you with the following:
Exhibit A: Dominatrix The First
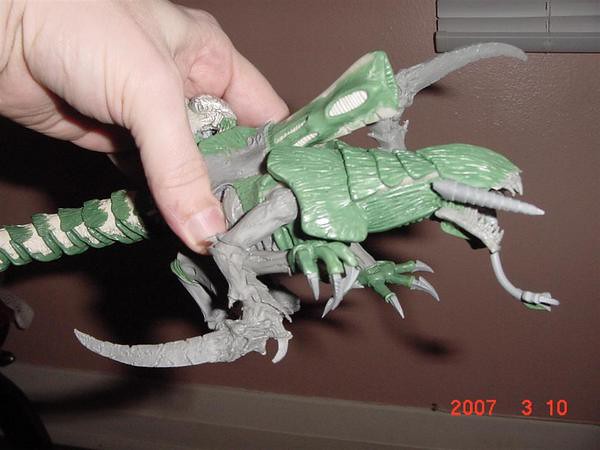
Exhibit B: Dominatrix The Second
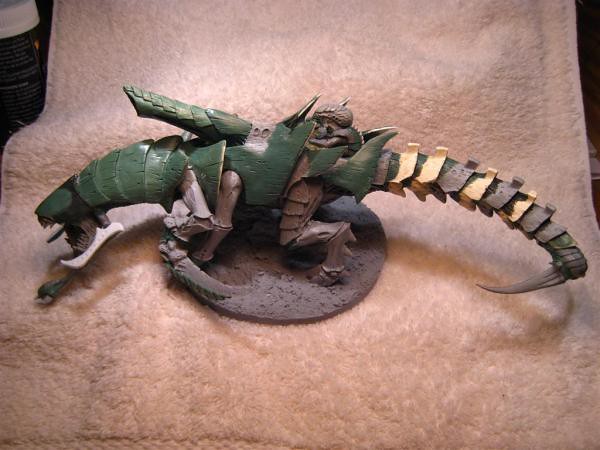
So, basically, you will be discouraged. You will want to chuck what you just sculpted in the bin, or you may want to tear off all the putty and start over again. This is normal. Everyone goes through it. If you keep on trying, you will improve. All you need is practice.
If you're looking for my suggestions for practice, try working from pictures or concept sketches so they can keep you on track. Try sculpting bases or adding random mutations onto marines (everyone has got marines kicking around, and it's not like anyone's going to miss them). Start sculpting bigger stuff, where you don't have to worry about as much fiddly detail, then progress to smaller and more detailed projects. Try putting a lump of putty on your work surface and push it around with your tools to see what kind of shapes they can make and what combination of angle and force you need to use to make them (as I did below for this article). Just play with putty, and that time spent playing will be an investment in your sculpting ability.
Alright, so to review the caveats:
1) Always lube up your tools
2) Have patience with your sculpting
3) Sculpt in levels or stages
4) Practice. Practice. Practice. Everyone's crap the first time :)
Alright. Now that we've got the caveats out of the way, we can get onto the sculpting. As an example, here is the way my workstation looks while sculpting:

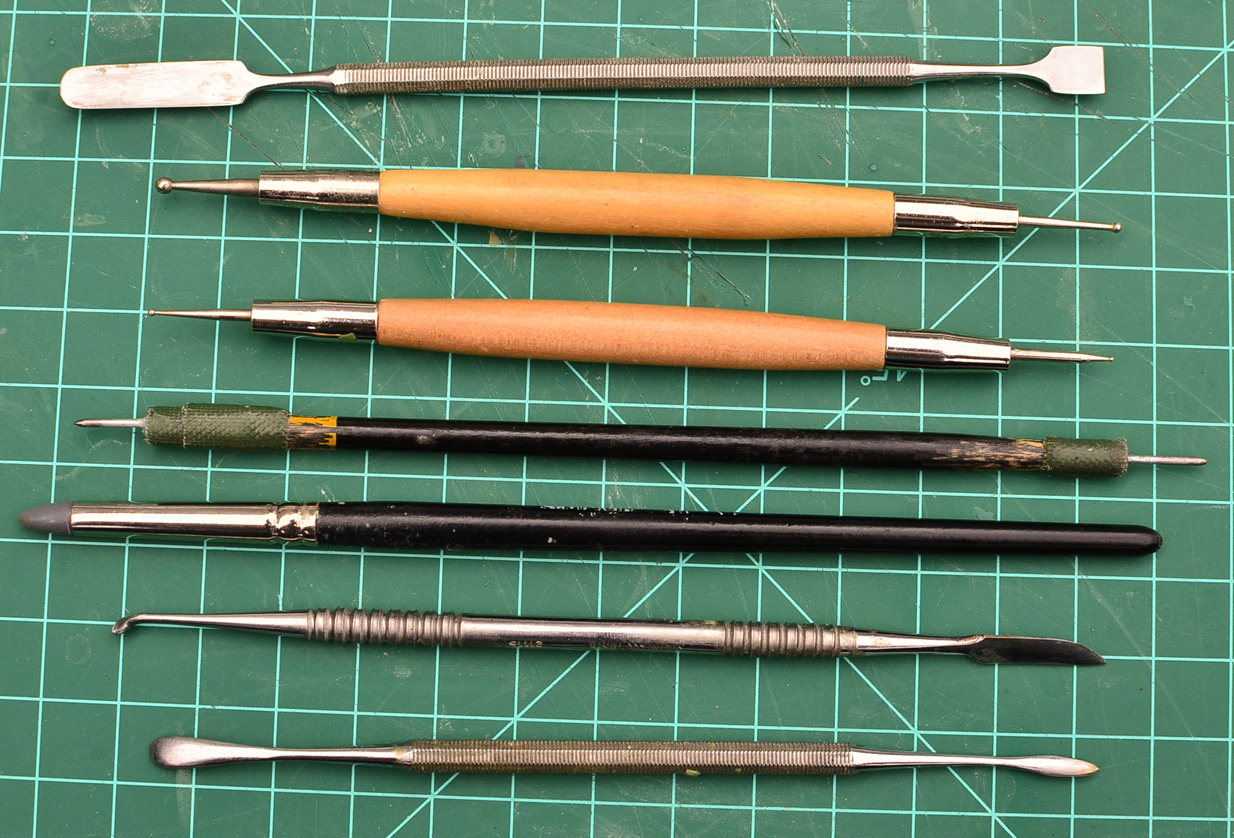
As I said in my first article, my favourite tool has got to by my 'spoon' one (I think the name for the dental tool is an 'elevator'?), of which there are clones in the cheap-o wax carving set I mentioned.


Still, this knife blade tool is perfect for cutting sharp, straight lines into putty, and I use it most often when working on Tyranid carapace plates. The sharpened edge is used to cut the shape of the plates and to separate the upper and lower plates, while the flat side of the blade is the perfect thing for flattening the surfaces of the plates. Once they're cured a bit, you can go back and add some cracks to them with the knife blade, and you're good!

I also use the knife blade when I'm marking out the breaks in the spinal columns on all my Haemonculus gribblies. It should be noted that a well-lubed exacto knife can stand in for this sculpting tool, and the only thing you're going to miss is the curve towards the end of the blade, which is sometimes useful for shaping curves into armour.
NEXT! Ball burnishers/embossing tools. Though these come further down the list after the spoon and knife tools, they are no less indispensable.

These, unfortunately, cannot be found in the cheap-o wax carving set. You'll have to get them on their own, and they run about $5-$9 each. They are completely worth it, though. They were so very key when I was stumped as to what texture I should use for massive areas on the underside of the Dominatrix:
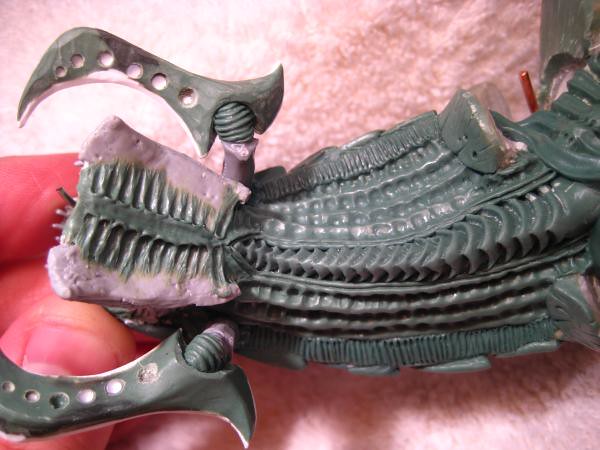
Answer? GO TO TOWN with the ball burnisher ;) I love using them to make organic patterns, and, if used carefully, they can serve to sculpt in subtle valleys between muscle of connective tissue. Here's an example of the kinds of patterns you can make using them:


Here's hoping you can see what I mean, because I'm sure I'm doing a pants job of explaining it:


I think I also used them a goodly amount on the insides of my quick'n dirty Mycetic Spores:


NEXT CONTENDER: The Hydra Tool

He swears by this tool when it comes to sculpting Tyranid ribs. I didn't do near as nice a job on the test piece of putty below, but I think it still illustrates the potential of such a simple tool. It can perform similar patterns to the ball burnishers, but it has the advantage of being straight, rather then indented behind the ball ends, so you can use the straight shape of the nail to press in furrows.

Next we have another tool that I was turned onto courtesy of Hydra. He was preaching its merits loudly when he recently visited Canada, and he believed in it so strongly that he decided to leave me his when he flew back to Germany. He called it a silicone brush, but I have since found a smaller version of it in DeSerres here in Canada (which I bought immediately), and they seem to call them silicone paint shapers. I guess they are used for moving around thick pigments, like oils.


Finally, we have the second entrant from the Howling Banshee Power Sword school of sculpting: the humble Old Pen Parts.

Yeah, not much to look at, but get a load of THIS:

Here is an idea of how I've applied them to nids, but they are the perfect things to use for some special-ops type troopers who have your typical helmet visor replaced with all manner of optical scanners.


How's that for enhanced senses?
YEESH. So I think that about does it for the techniques I use with my various tools. I hope it has been helpful and has inspired you to think about the kinds of things you can accomplish using some epoxy putty. Next up, I hope to do some articles focusing specifically on the kinds of things I tend to sculpt all the time: namely, Tyranids and Haemonculi Coven Gribblies (oh, there will be spinal columns!).
If you have any suggestion on the type of sculpting tips/techniques that you would like to see covered in an article like this, please post them in the comments below, and I can see about making them a reality!
Also, if you know anyone who this series of articles would be useful to, please send them the links or post the links to your own site. I have no issue with people reposting my articles so long as they are attributed to me and linked back to this blog. Like I've said before, it is my belief that ANYONE can sculpt, given a few pointers, and it is my mission to empower more people to pick up the putty!