Moonclan Grots dominate today's previews for the new release of Nightvault. The Zarbags Gitz along with the Eyes of the Nine (tzeentch warband) are up for pre-orders this weekend.
via the Warhammer Community
https://www.warhammer-community.com/2018/10/03/3rd-orkt-warband-focus-zarbags-gitzgw-homepage-post-2/
This weekend, Zarbag’s Gitz – a screeching warband of Moonclan Grots – will be scuttling their way into the Mirrored City as they, and the Tzeentch-worshipping Eyes of the Nine, go on pre-order. Read on as we take a look at the fighters, cards and tactics for one of Warhammer Underworlds’ wildest warbands…
Leading the warband is Zarbag – a Moonclan Shaman armed with a sickle, an enslaved Sniffer Sprite and a nasty glare. Zarbag is one of the most fragile Leaders in the game, but he’s a great Wizard and a surprisingly potent fighter when Inspired – be sure to keep him safely behind the rest of his Warband before leaping out to finish wounded enemy fighters.
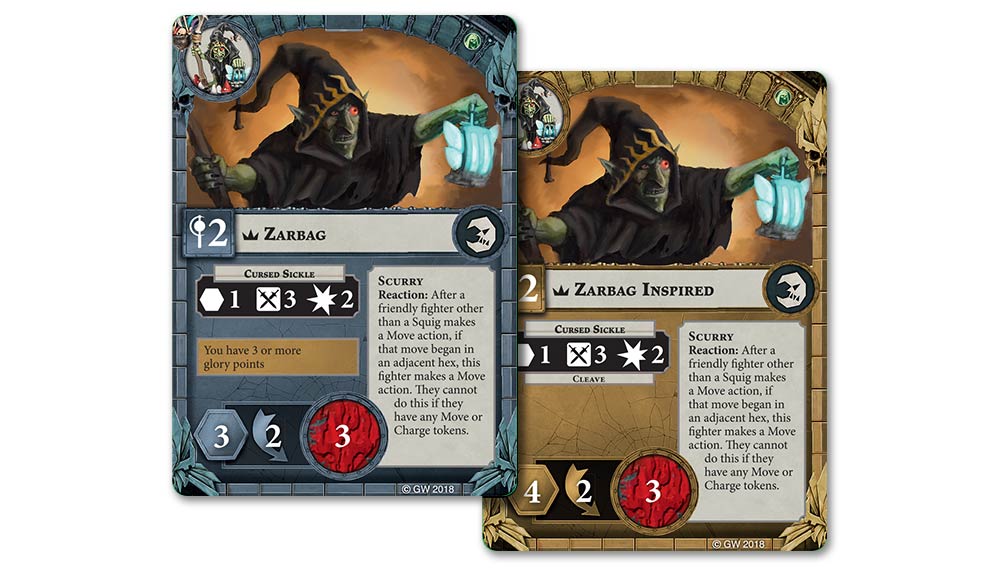 Usually, with nine fighters, you’d need three turns to just move them all, but as you can see, Zarbag and his grots have a rule called Scurry that lets them keep pace with each other. Keep your grots in a chain and, with some smart play, you’ll be able to move them ALL in a single activation, allowing you to capture objectives and set up deadly attacks in a single fell swoop.
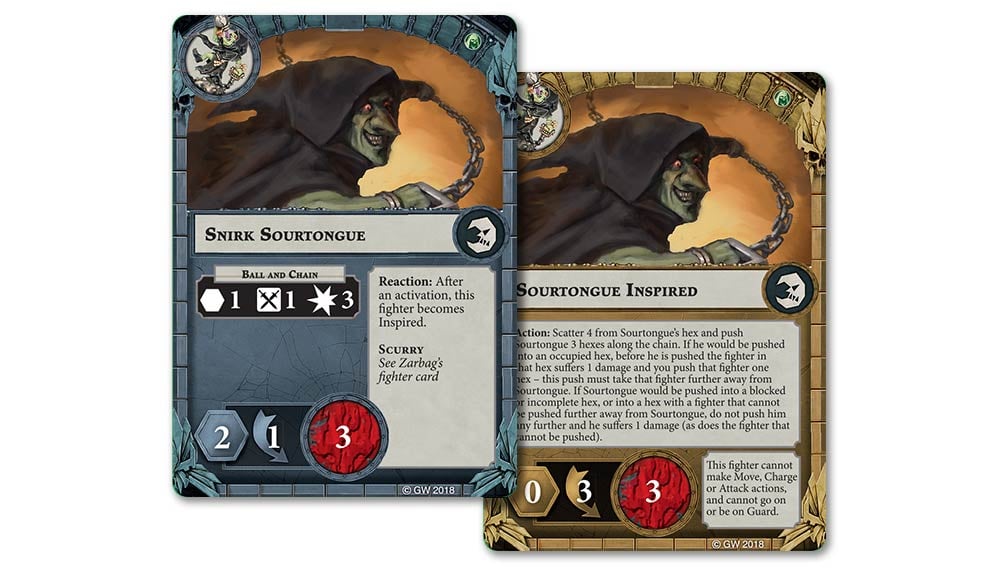
Snirk is a Fanatic – not so much a fighter as an unstoppable force of nature. The second you activate Snirk, he’ll Inspire and start scattering around the board, colliding with enemy fighters and generally ruining any of their carefully laid plans. Try to set him up in a position to cause the most trouble.
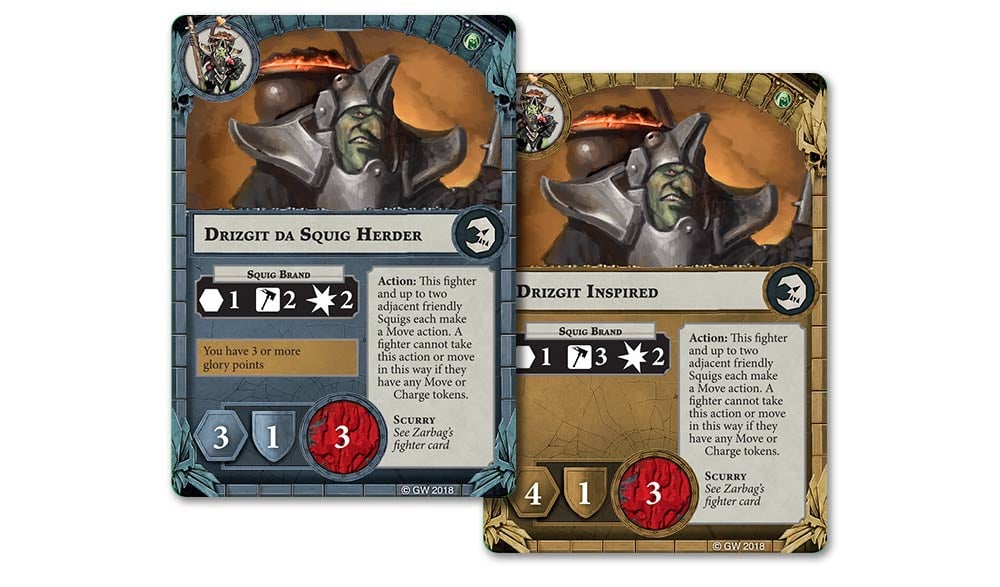
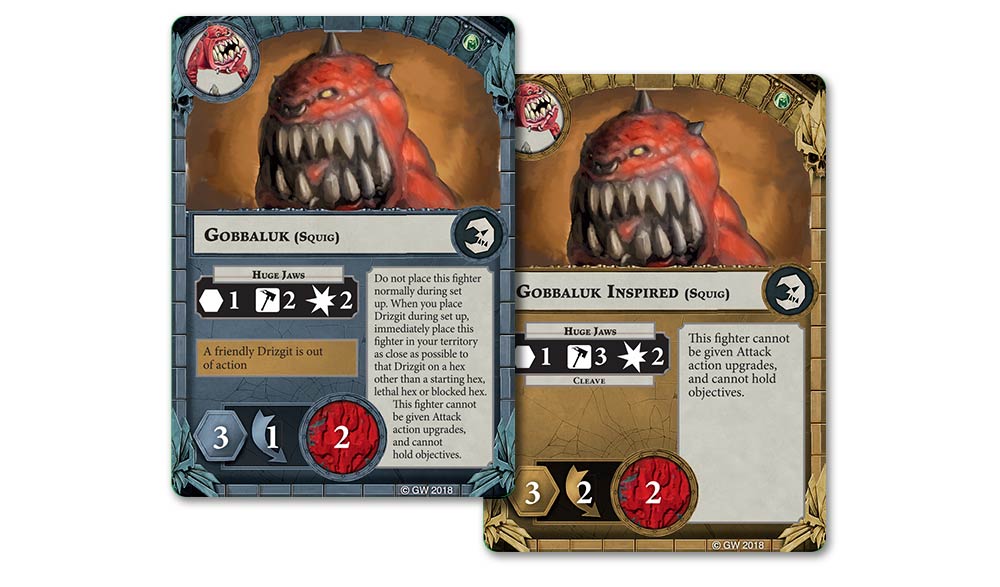
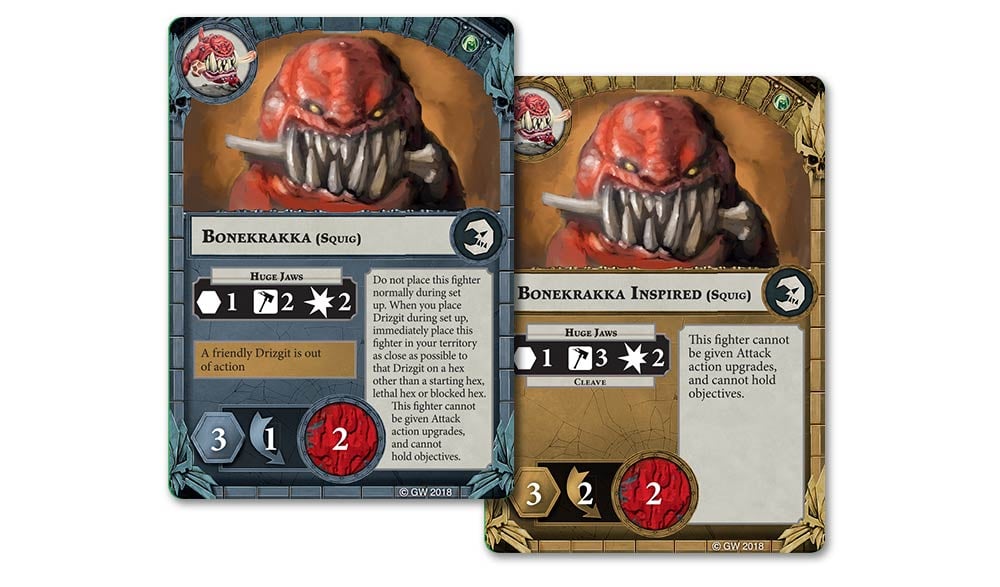
Drizgit is a Squig Herder, and is surprisingly well armed and armoured for a grot. You’ll want to keep him on your front lines as a fighter – and use him to shuffle your Squigs around. Speaking of which…
Gobbaluk and Bonekrakka provide most of the offensive punch for Zarbag’s Gitz, thanks to some BRUTAL attacks and a simple-to-score Inspire condition that forces your enemy to avoid killing Drizgit. These guys might be fragile but, combined with your grots, you’ll be able to use them to bring down even the toughest of foes.

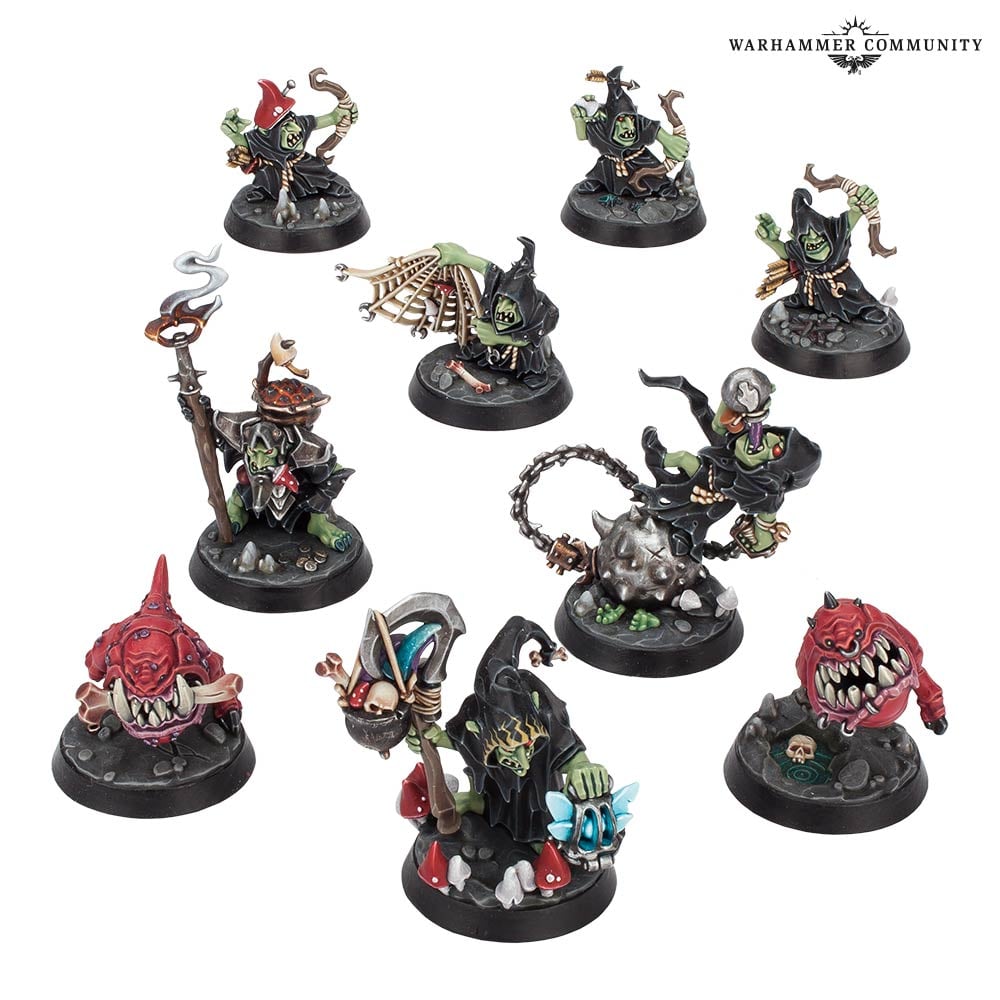
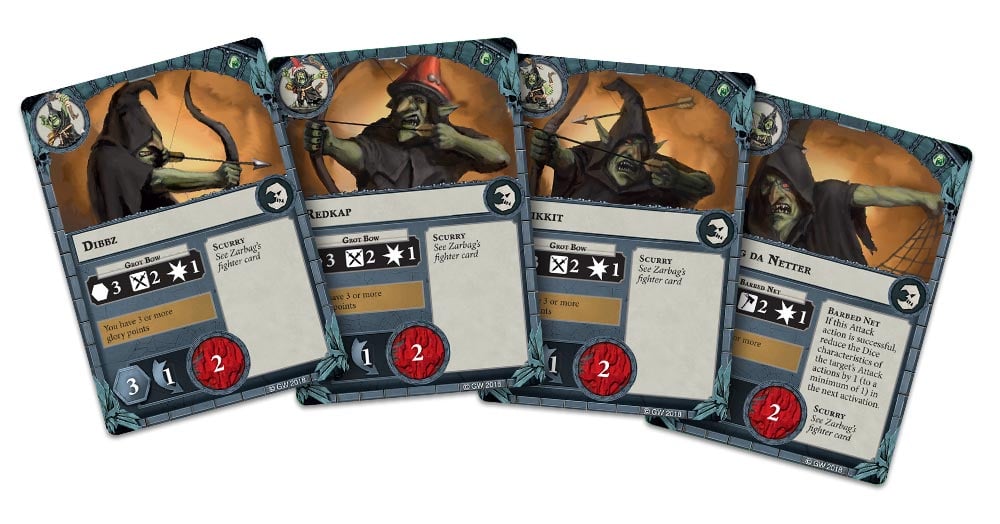
The rest of the warband is made up of a diminutive pack of grots. Individually, they’re not particularly powerful, but collectively, they’re great for holding objectives, providing support or just forming a living barricade for your better fighters.

Playing Zarbag’s Gitz requires a bit of kunnin’ but, with a little finesse, they’re an incredibly rewarding warband to use. To take advantage of their unique movement and activation rules, you’ll want to deploy each model as close to each other as possible, arranging your fighters in chains to make the most of Scurry. Having lots of Fighters almost means having lots of support – with two mates in support, you’ll double both your defensive and offensive capabilities for most fighters.
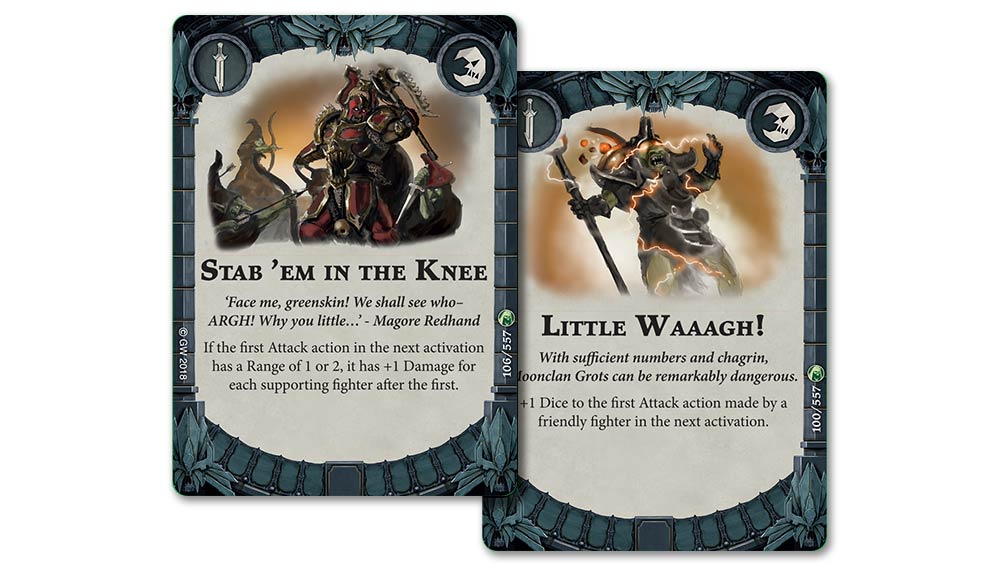
Zarbag’s Gitz also have a number of powerful ploys with which to bolster your attacks, like Stab ‘em in the Knee and Little Waaagh!
In terms of play style, scoring early glory is key for Zarbag’s Gits, and you’ll be getting most of it through grabbing objectives or racking up kills with Zarbag, Snirk and your Squigs. While the warband might take a little while to build up momentum, it’s incredibly hard to stop once you’re rolling and is particularly punishing for warbands with fewer fighters to face. You could take out a grot in every single activation of an action phase, and still not have killed half of the warband!
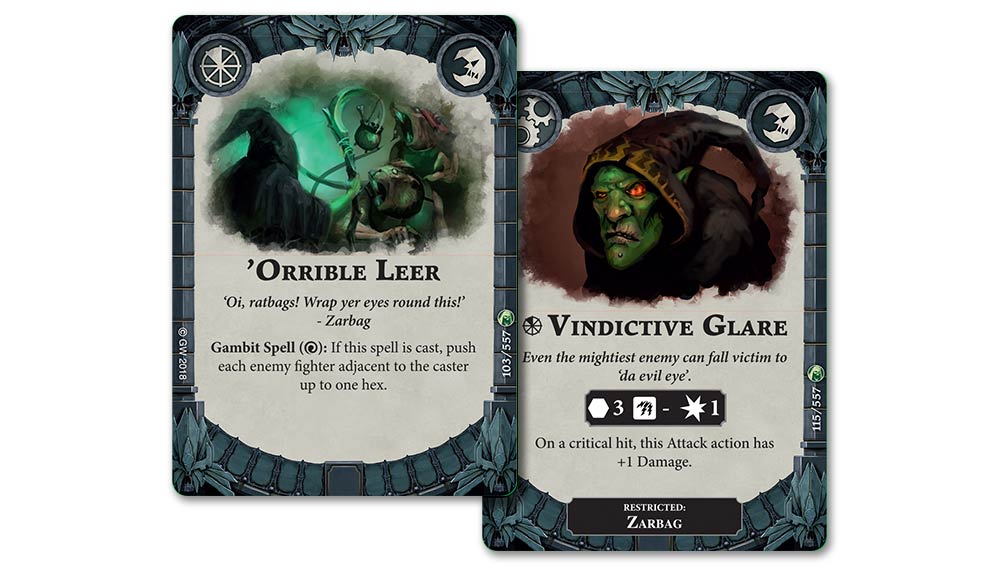
Zarbag himself is a crucial fighter and one that’ll be vital to victory in your games. As a level 2 Wizard, he can reliably cast a range of strange sorceries, like ‘Orrible Leer and Vindictive Glare, letting you respond to the shifting circumstances of each game.