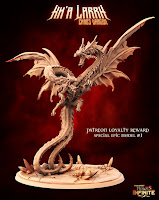
With the War Mammoth model finally available on the Raging Heroes website to order as a miniature, I was excited to get my own today as a 6 month reward for the Heroes Infinite Rewards program.
Since I know most of you do not do 3D printing I thought I would go through the process of getting it and what it takes to go through and print it up! After all I really want to see just how big and detailed this guy is!
Getting the files
You cannot just purchase the War Mammoth STL files. You have to be a Patreon member for 6 months and you get it as a 6 month reward for no additional costs.
Each month does cost $10 a month, but also gets you all those months of Patreon releases. For me that included these months below. Here is what I received in files for all these months. (Ive printed out quite a few if not most of the Summer and Winter Fairies). Link for those interested.
 |
| 3 Month Reward |
Back to Kahr Marrohk War Mammoth.
So as is normal you receive an email that your file is ready for you to download with an exclusive password for you. This takes you to Sync where your files are waiting. You do have a restricted number of days (about 10 days) to download the files, although Im certain if you missed it you could always request help from Heroes Infinite.
You can see in the image what the file downloads look like. I grabbed a couple pics of the War Mammoth (although the zipped files mostly contain more images) and both supported/non-supported files. Always download both just no matter if you do your own supports or not. It is a big must just encase you need something down the road.
The files downloaded quickly - not a busy download time- and the files are small compared to a monthly release.
Once you have them- unzip em!
I went straight for the supported to show you, but there are 15 files for printing Kahr Marrohk. Some are simply hollowed versions making breaking it down to something like this.
11 files to print for the War Mammoth
4 files for the Base
I always like to start at the beginning so I loaded up the first three files which fit nicely on the plate and got them ready to print. I looked at the supports for these files and they looked good with the pre-supported (otherwise I would do them myself), and aligned them up for printing.
Note I am using the hollowed out file for the body. This saves a ton on resin for such a large miniature.
Now I have my first print all ready to go and its time to slice it. This literally just gets each layer ready and is a simple push of the highlighted button in the image above. This takes about 30+ seconds to do and save the file to a thumb drive.
Now ready to go I remove the thumb drive and put it into the printer. For those of you that do print, I left up my settings that I have been using.
Pour in the resin, (which I forgot to give it a quick shake in the bottle- but should be OK). Hit go and wait.
While one is printing I will be preparing the next print and later tonight show the results. Assuming it all works out.
I will show off the progress as the model gets printed. My overall plan is to get another print going tonight so it can print while I sleep.


