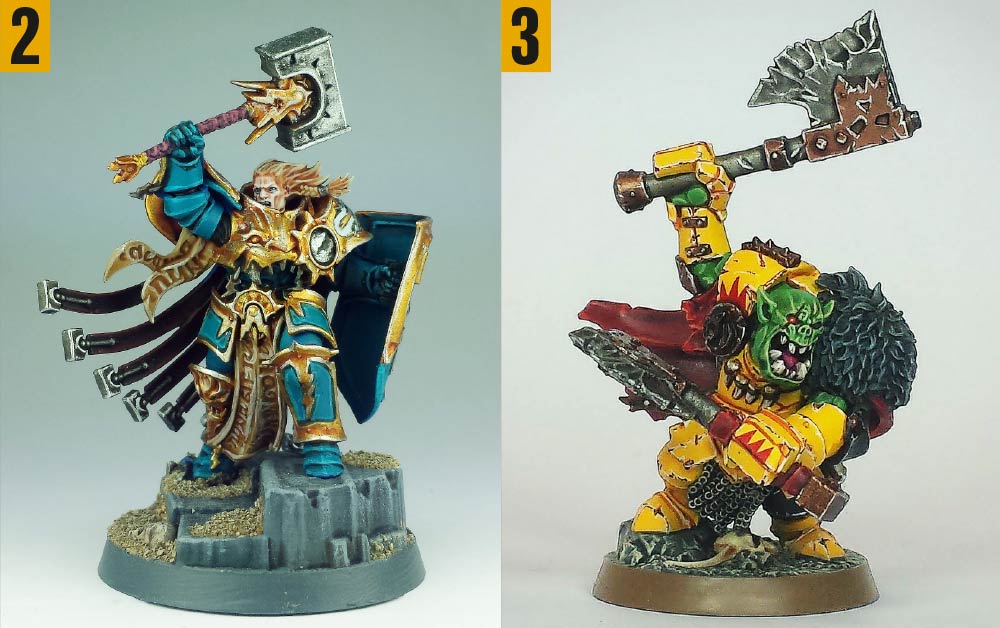
We have had a couple of these types of articles over the years, and I always find these very important and helpful. This one is done well, and goes into the use of our smart phones as well.
Don't forget to send in up to 8 pics here on Faeit 212 for the What's On Your Table series at natfka@live.com
via the Warhammer Community
https://www.warhammer-community.com/2018/03/06/the-model-photo-how-to-photograph-models-for-display/
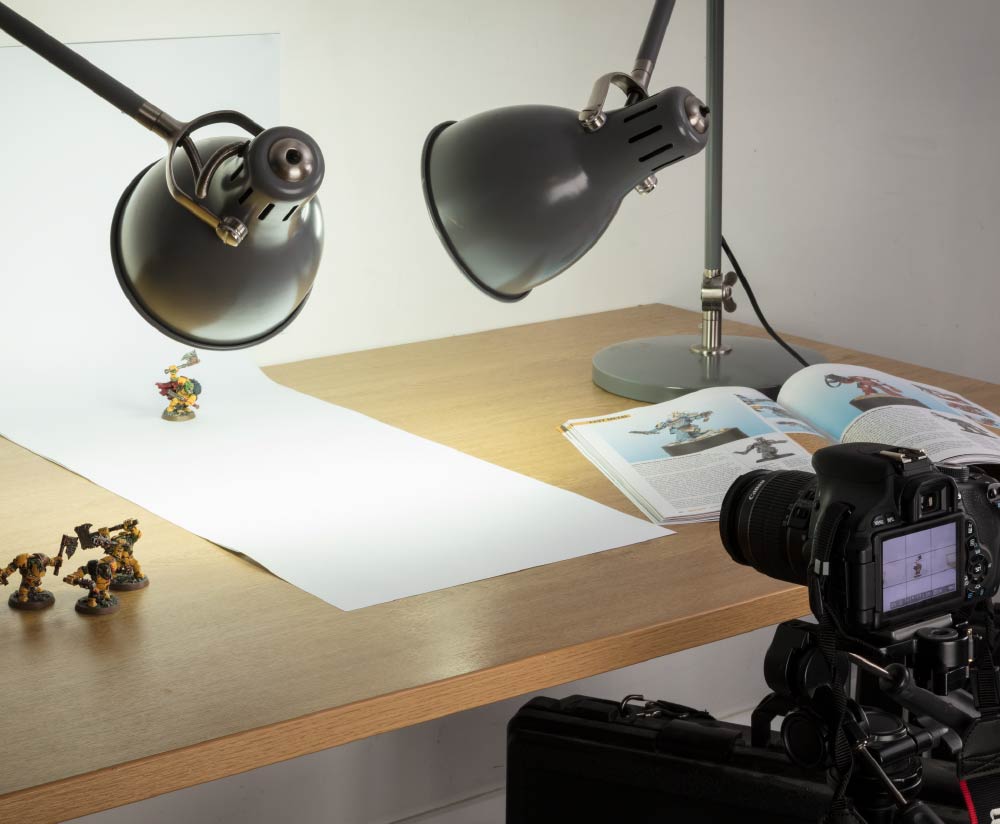
Before you take out your camera, it’s important to set the scene for your pictures. We suggest a simple setup with a plain white background – a piece of paper stuck to a sturdy backdrop is a quick and easy solution and perfectly suitable for the job, providing a neutral backdrop for your models. We often use a white background as it helps show off the model in the best light, with no distractions from the details of the miniature.
Here you can see our setup, which has the model positioned on a large piece of matte white paper 90cm away from the camera. You can read more about the lighting and camera setup over the next few pages.
Top tip: If you’re really serious about photographing miniatures, look at investing in a light box. You can find them in most camera shops andonline.
Lighting is one of the most crucial aspects of photography – at the simplest level, if you have no light, you have no picture! Here’s our advice on getting your lighting just right.
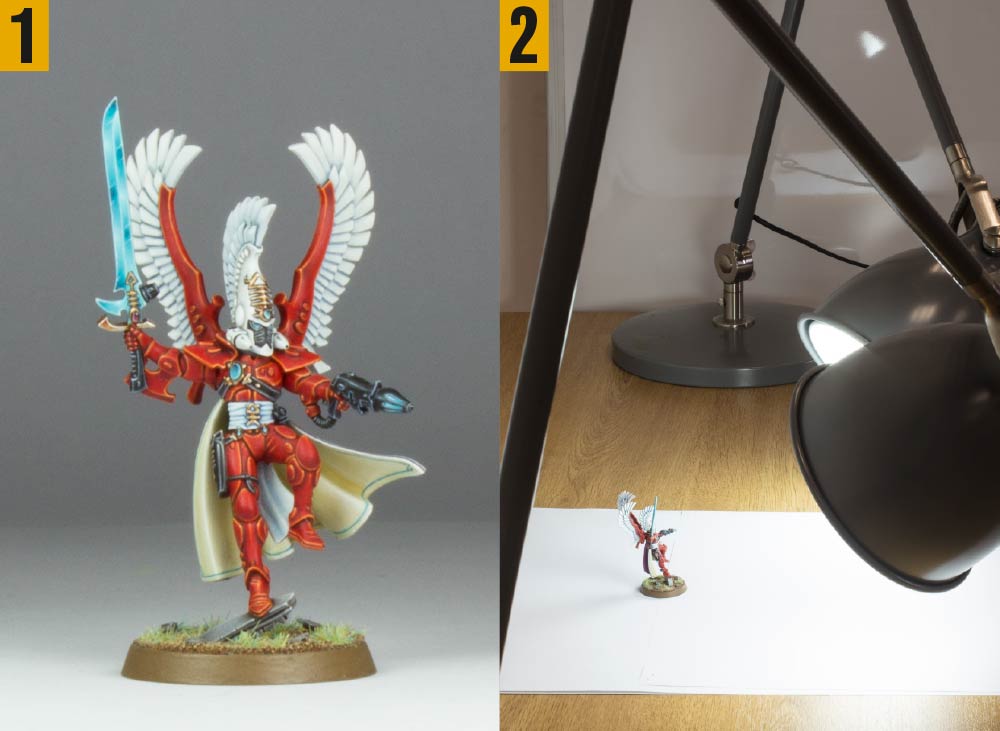
When taking pictures of miniatures, you need a consistent, even light. The best way to achieve this is with lamps – specifically, daylight bulbs. Daylight bulbs provide a neutral light, not too yellow, not too blue, but just right for taking pictures of models. They’ll fit most standard desk lamps and they’re easy to get hold of. Two lamps positioned in front and slightly to either side of the model work best, lighting the front of the miniature. To the left you can see what a model lit with two lamps looks like (1), while next to it you can see what the lighting setup (also shown on the previous page) looks like from the side (2).
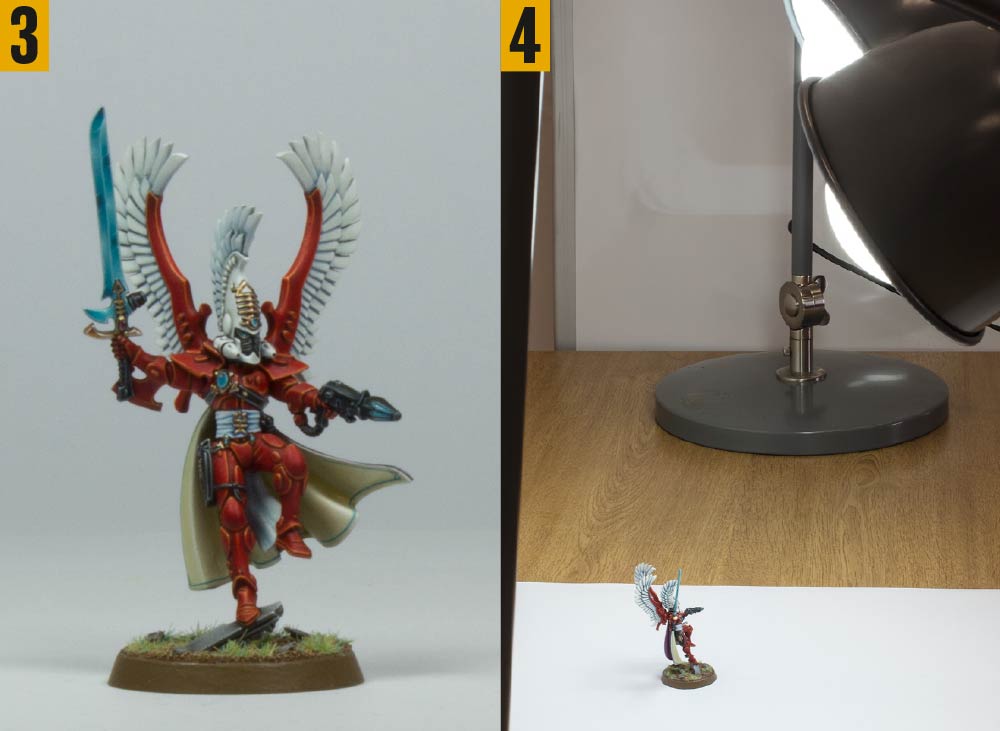
Always remember, you’re lighting the miniature, not the background. Don’t worry about getting a solid white background, especially if it would cast a less than favourable light on the miniature. In this example (3), the lights have been placed too high above the model (4). The backdrop is better lit, but the model is now too dark. If you wanted, you could add a third light situated above the model and pointed just at the background, but this is usually not necessary unless you want to specifically draw attention to the background – for example, if your model is on terrain.
It’s also important to make sure that your lighting is not too hard or soft. Your miniatures are painted to have their own shadows and highlights, so you don’t want to misrepresent your hard work by over or under-lighting some areas. For this reason, the light we want is soft and even, as it will let the painted shadows and highlights show where you intended them to be. A great way of testing whether a light is hard or soft is to check the shadows it produces.
A hard light, such as one from an LED bulb, will create shadows with sharp edges (5), whereas a soft light, like the one cast by our daylight bulbs, will produce shadows which have no defined edges (6). It’s worth noting that natural daylight is not a good substitute for a light setup, even if it is really sunny. Natural daylight varies constantly, making it hard to get a consistent level and colour of light in your pictures. A cloudless day, for example, will often make your pictures come out too yellow, while an overcast day will leave them blue. Avoid using the on-camera flash, as it will create a photograph that has very harsh and high-contrast light. Remember, you want the light to be as soft as possible.
Top tip: If your light is too hard, you can soften it with a sheet of tracing paper over the light.
Citadel miniatures are covered in wonderful details and sometimes it can be hard figuring out what angle to take your picture from. Here’s a little bit of advice on finding that golden angle.
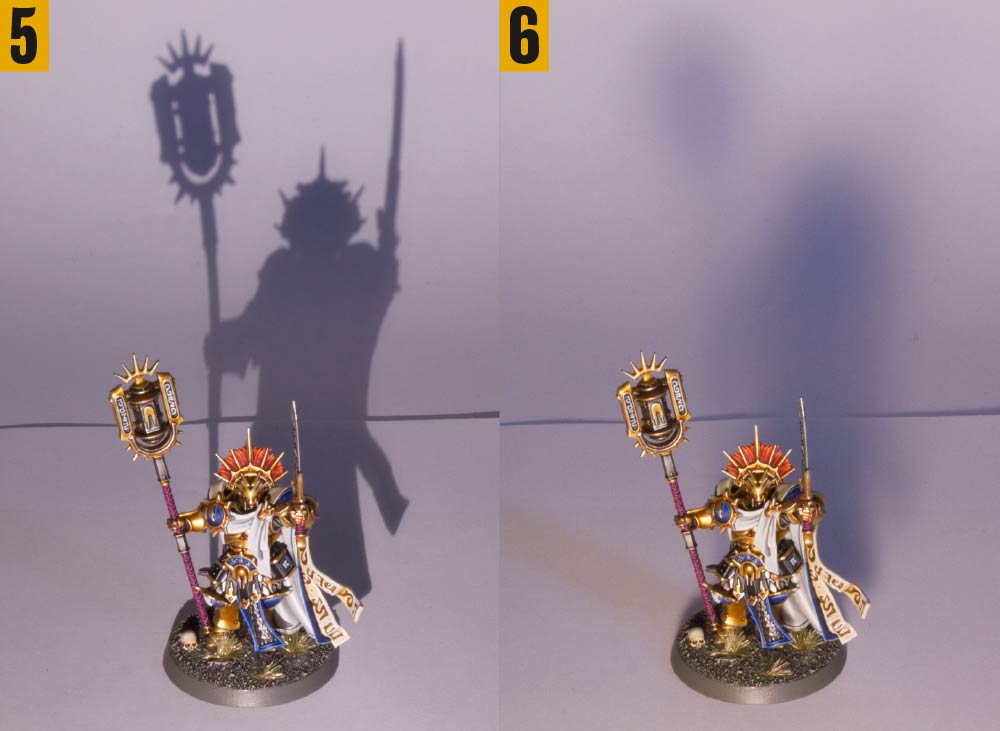
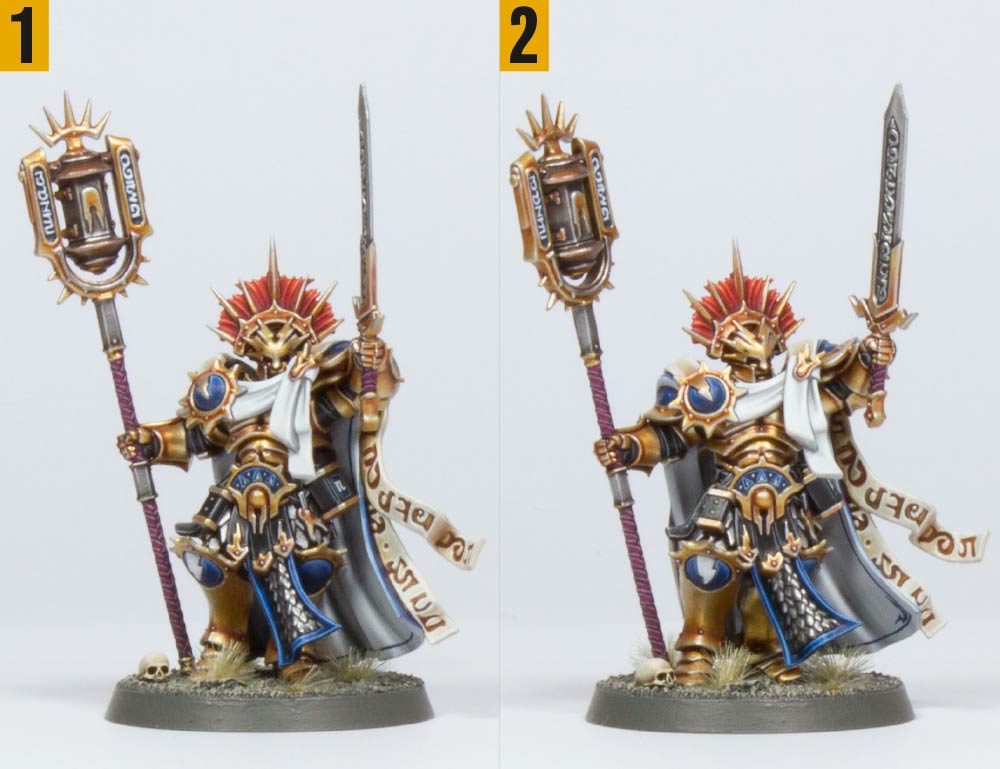
Every miniature has a golden angle, a viewpoint that best captures the essence of the model. For infantry, this will almost always be a frontal view of the model, where you can see its weapons, face and body clearly. If you take a picture and all of these key areas aren’t visible – in this case, the model’s sword (1), turn the model around a little and try another angle where you can see all of the model’s most important details (2).
Some miniatures, like Khârn the Betrayer, for example, can be pretty hard to photograph, so if you’re ever unsure of a model’s golden angle, just have a look at how it’s been photographed on the Games Workshop website or in the Planet Warhammer section of White Dwarf. If you match that angle, you can’t go wrong!
Another important factor to consider is the vertical angle of the camera. Looking back at the setup earlier in the article you’ll notice that the camera is level with the model, not angled down at it. We refer to this angle as a model’s-eye-view, as the camera lens should be at the same height as the model’s eyes. If your camera is positioned too high and angled down towards the model, you’ll get a lovely shot of the model’s shoulders, the top of its head and its base, but little else. As you can see with the Lord-Veritant in image 2, the top of his base is hardly visible at all.
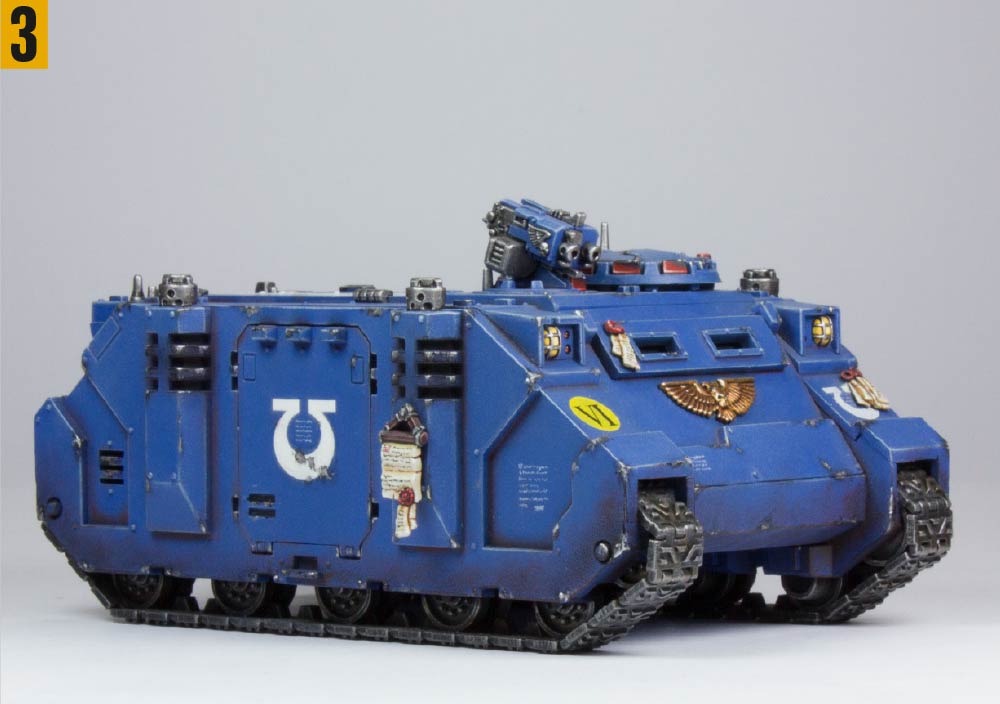
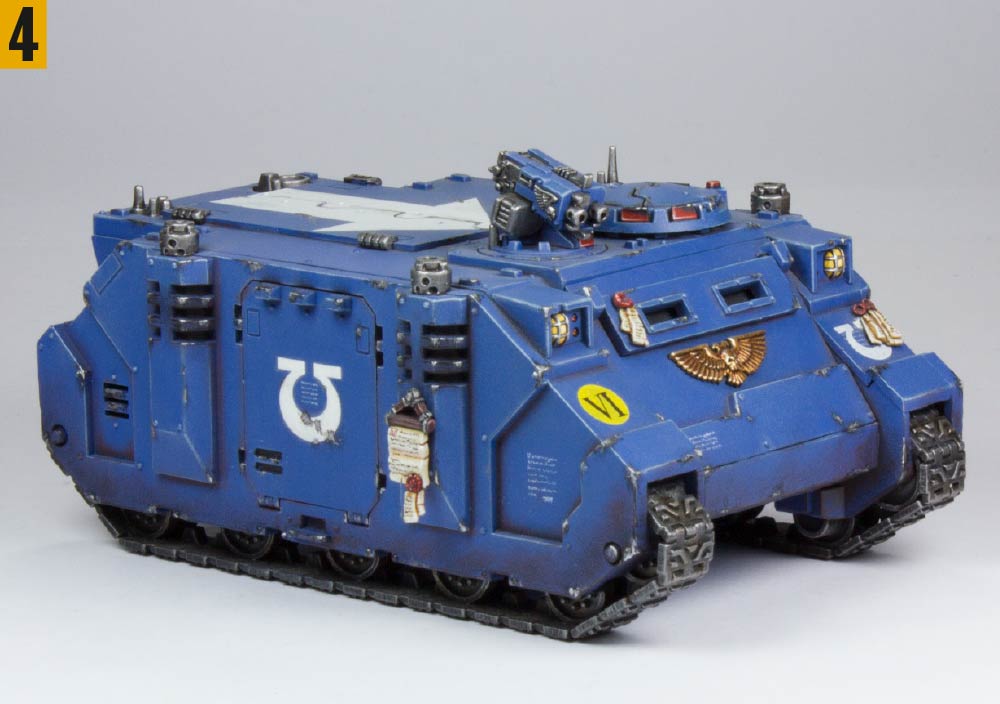
However, for larger miniatures such as tanks and monsters, it is usually beneficial to experiment with the angle of the camera, as shooting from too low may fail to capture the shape of the miniature (3). Try raising the camera a little to capture the depth of the miniature (4).
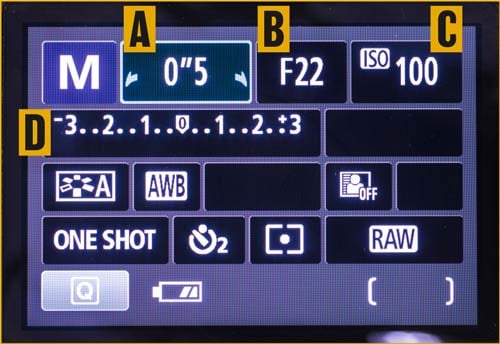
Next, we’ll be talking about some of the settings on your camera. If you have a DSLR camera, you will be able to see these on the screen on the back of your camera. On the back of one of our Canon cameras, you can see the shutter speed (A), f-stop (B) and ISO (C). Below them is the exposure bar (D) – a sliding scale that indicates how all three of these settings interact.
One of the toughest parts of photographing Citadel miniatures is arguably getting your pictures to be wholly in focus and of a usable size to see all the details. How do we go about doing it, then?
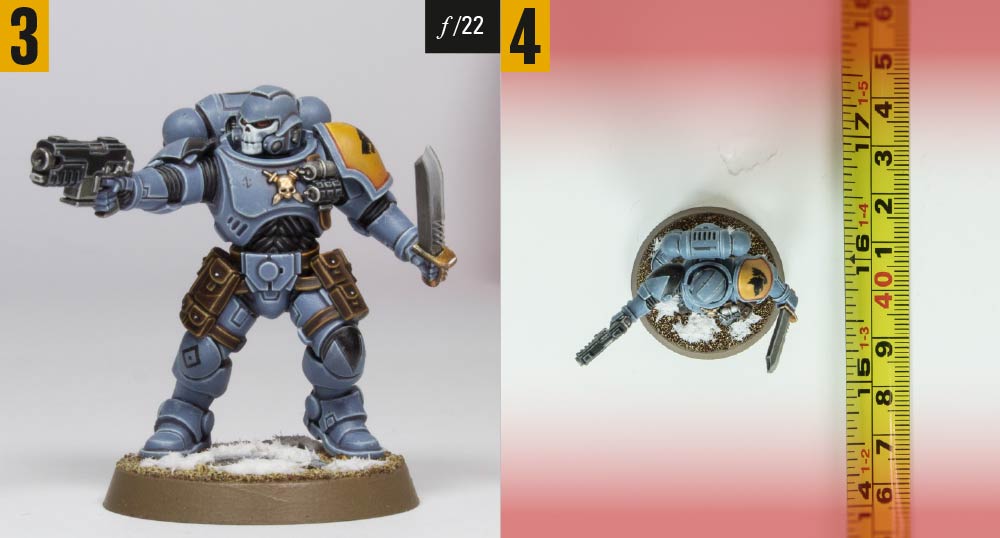
Miniatures are often pretty small, so you need to make sure you are close enough to get a usable picture. This doesn’t mean you need to fill the frame, but aim to fill at least one-quarter of the viewfinder. Just be careful not to cut the ends off weapons and banner poles – you want a picture of the whole model, not most of it. The biggest drawback with moving the camera in close is that parts of the model may go out of focus, in this case, the Reiver’s gun and blade (1).
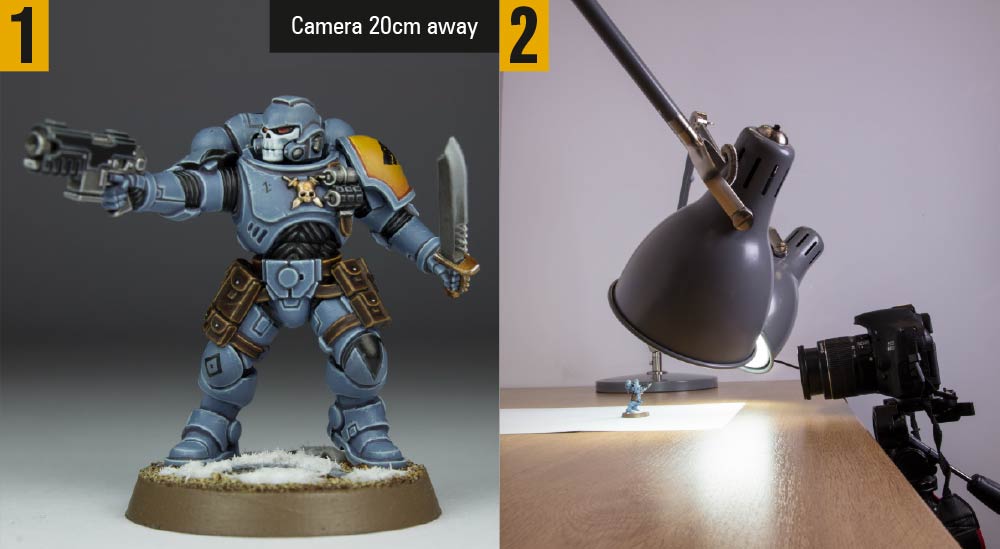
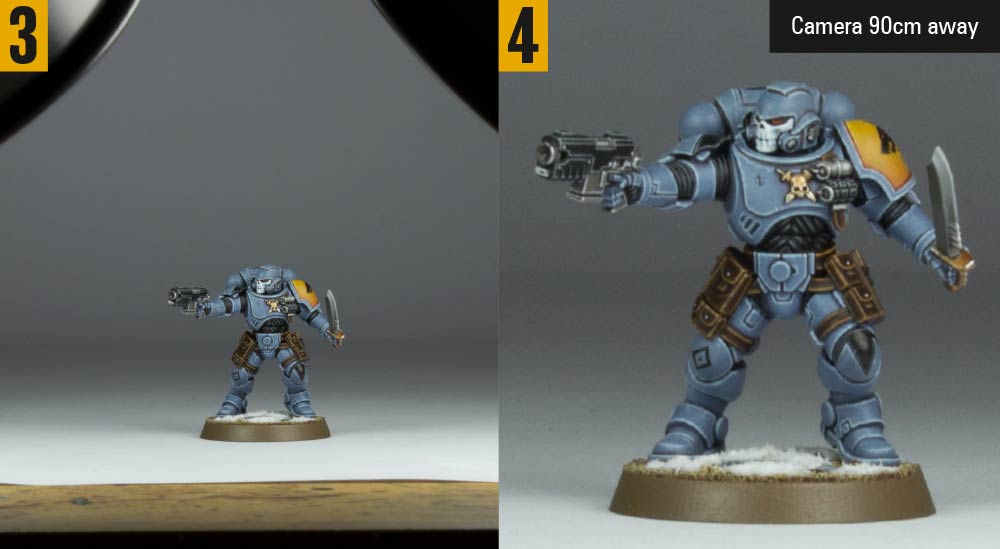
The camera in this example was only 20cm away from the model (2). If the shot is not entirely in focus, move the camera back from the model and try another shot. If it’s still out of focus, move the camera back and try again. In this example, the end result is a picture where the whole model is in focus (3) – the camera was 90cm away from the model. Obviously, the model now looks tiny, but you can see, when viewed on a computer, that the image size is still large enough to capture all the details of the miniature (4). These distances work for our camera, which is 18 megapixels. If your camera is a lower resolution, you’ll need to place it closer to get a big enough image.
Top tip: If your model appears really tiny in the viewfinder, remember that your camera probably has a zoom function.
So you’ve got your model placed on a clean white background, your lights are in the right places and your camera is in position ready to take some pictures. But is your camera set up correctly?
If conditions are right, you might be able to take your pictures with your camera on its automatic setting. To get greater control of your shots, though, you’ll need to use the manual setting and adjust the aperture, shutter speed and ISO.
The aperture controls how much light comes through the lens and how much of the photograph is in focus. The aperture is described by a measure known as its ‘f-stop’, with low numbers representing more light but less in focus and high numbers less light with more in focus. The higher you can set the f-stop, the better. The standard lens that comes with most cameras will have a range between f/5.6 and f/22 with the lens zoomed all the way in. A low f-stop (1) will leave your model fuzzy and out of focus in places such as the model’s extremities – this example is f/8. From above (2) you can see the focus depth of the camera only covers part of the model.
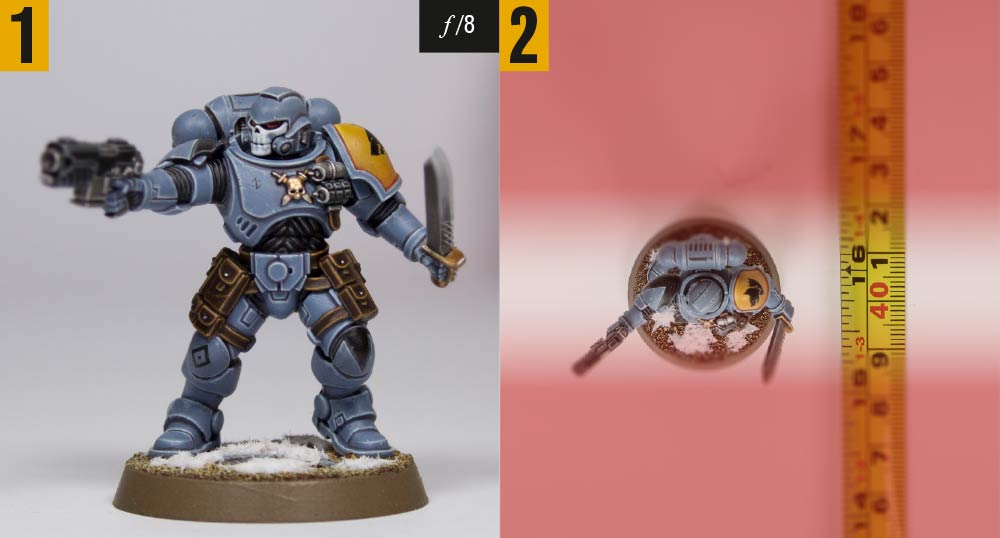
A higher f-stop (now f/22) will get all of your model in focus (3) because of the larger focus depth (4).
The longer the camera’s shutter stays open while taking the picture, the more light will be let in. Shutter speed is a measurement of time, and most cameras range from 30 seconds to 1/4000th of a second. If you’re taking pictures by hand, you’ll need a shutter speed of 1/100th of a second or faster to avoid getting blurry images as you move the camera (5). We also recommend using a tripod if you have one, and if not, supporting the camera on a stable surface as it will make it much easier to get sharp photos (6). Sometimes the shutter speed will be very slow, sometimes as much as a second. This is fine as long as the camera is kept steady during the exposure.
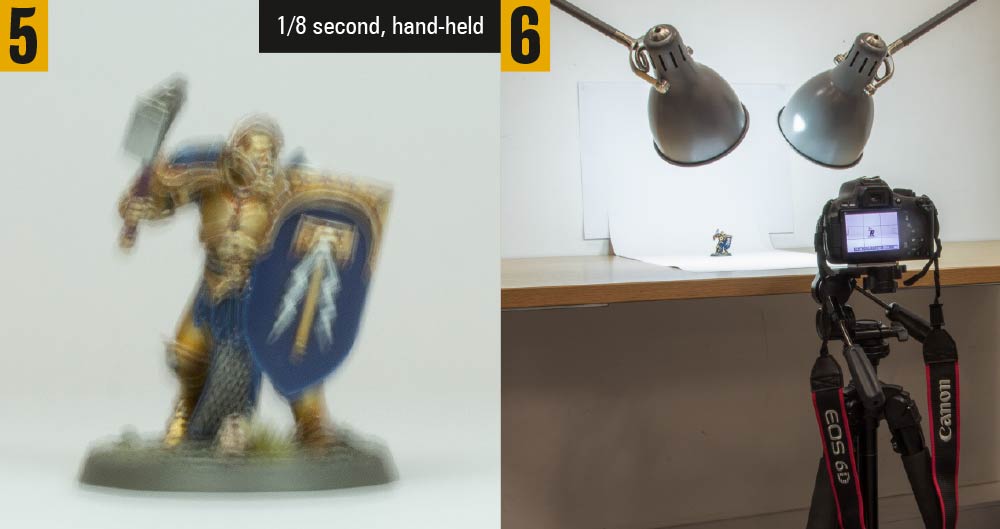
Top tip: Use the camera’s timer function so you’re not touching the camera at all when the picture is taken.
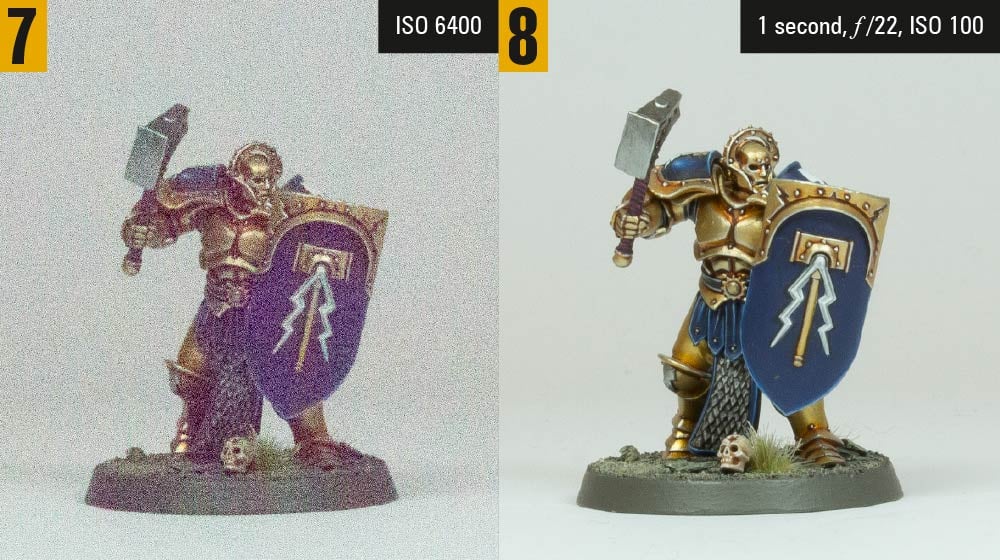
You can also fix a lack of light by increasing the ISO level. The ISO represents how sensitive the camera is to light. A higher ISO makes more of the available light but will make the picture grainy (7). Instead, set the ISO as low as it will go – 100 is the lowest on most cameras and we recommend never going above 400. You can then alter the shutter speed to compensate for low light levels – aim to get the marker on the exposure bar near the centre of the scale for a good exposure. The end result is a picture where the whole model is in focus, the light levels are correct and the quality of the picture is wonderfully sharp with no graininess (8).
Selfies, impressive meals and cats doing strange things are often the subject matter for camera phones. But how good are camera phones for taking pictures of Citadel miniatures?
The first thing to note when using a camera phone to take pictures of miniatures is that you’ll need to hold the phone a lot closer to the model than you would a camera. This is because the pinch zoom doesn’t work in the same way as the lens on a camera – you just need to get closer to the subject.
Phone cameras offer you very little control over their settings (ISO, aperture and so on), though interestingly the fixed aperture on a phone camera can often get more of a model in focus than the equivalent aperture size on a camera – this is a good thing and enables you to get pretty close to the model without its extremities going out of focus. In our example setup, you’ll notice that the lights are positioned a lot closer to the model, too (1).

Pictures taken on camera phones can often come out pretty dark – they look fine on the phone screen, but transfer them to a computer and you’ll soon notice a difference. Remember, you don’t have any control over the shutter speed, so moving the lights closer to the model gives the camera’s automated settings the best chance of getting a usable photo. The pictures to the right (2 and 3) were taken on a camera phone. Both have been brightened a little in Photoshop, but otherwise, nothing else has been changed. They are both entirely in focus and big enough to feature in the magazine. In fact, image 3 is the shot that Jonathan is taking in image 1. As you can see, the model isn’t filling the screen on his phone – if he’d moved his phone any closer it would have gone out of focus.
