

Ive always been real bad at this area of the hobby, which leaves me amazed and dumbfounded when someone does it well. So this was a particulary good article for me personally from the Warhammer Community
Will I give it a shot now? hmmm. Most likely not.... but it does demystify the steps.
via the Warhammer Community
https://www.warhammer-community.com/2020/04/23/freehand-lessons-from-a-master/
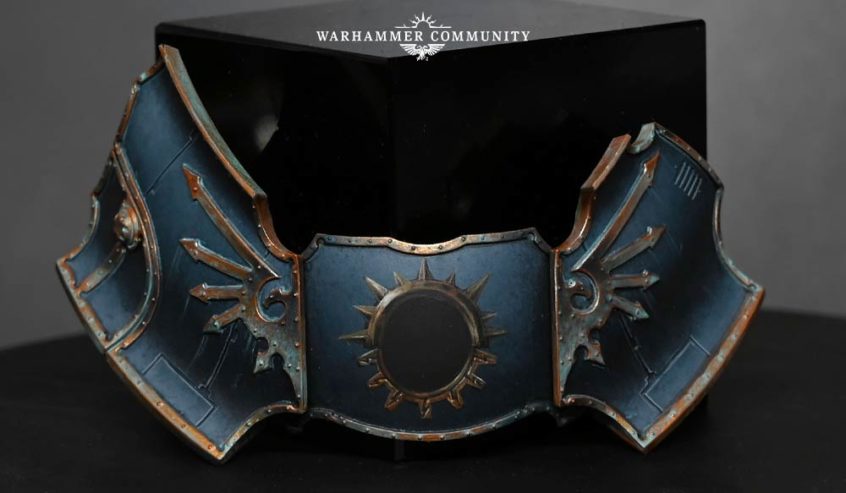
Richard: As a massive fan of Adeptus Titanicus, I knew I had to have the Warlord-Sinister Psi-Titan as soon as I saw it. After I built the model, I realised I would have to figure out how to add the Legio Sinister icon to the shoulder pads. With no transfers available, this would make an ideal project to show my freehand process.
The first thing to do when you want to freehand is a little research and planning. It’s very tempting to jump straight in and wing it. What usually happens if you do is that you run out of space, get details wrong and wish you had a transfer! With this in mind I looked for artwork of the Legio Sinister icon and managed to find a nice, large image. This tends to be when the true horror hits that you have a very detailed, large image that you need to fit in to a teeny tiny area.

Before you get started on your freehand piece itself, paint the background armour panel completely. It’s much easier to paint it now rather than trying to get nice highlights and transitions around your carefully painted freehand.

The colours I’m going to use for the freehand are as follows: For the non-metallic metal (NMM) sections, I’ll use Rhinox Hide, Mournfang Brown, XV-88, Dorn Yellow, and Screaming Skull. For the lion itself I will be using Mechanicus Standard Grey, Slaanesh Grey, Grey Seer, Abaddon Black and Mephiston Red.

To get started, I first map out the shape and position of the freehand in black. Start in the centre and work your way outwards to allow you to make small corrections as you go. If you try painting the outline straight off there’s a good chance you’ll get the position wrong, and then it’s very hard to change! For the spikes just make small marks for each position to make sure they are spaced correctly. The reason for using black as a base colour is that it’s much easier to build up the highlight positions and use the black as shading, to keep your tonal contrast high. It also means you can use black to correct any mistakes you make.

Once the outline is complete it’s time to move on to the next layer – NMM trim. Start with Rhinox hide and make very large highlight blocks. Remember that the highlights will get smaller and smaller with each layer. I didn’t make a straight copy of the reference artwork, but rather made the lighting come from the top left. This made it look a bit more dramatic and allowed me to build stronger highlights and shadows.
Hard edges and curves reflect the light more strongly, so focus on those areas for the brighter highlights. After the Rhinox Hide, continue adding highlight layers with the remaining NMM colours in the order listed previously. Save the XV-88 for the finest edge highlights.

After all of the trim is painted it’s time to start on the lion. This is where things get tricky! You should have a black, round hole in the middle of the design. Roughly block in the shape of the lion face using Mechanicus Standard Grey. This allows you to get the positioning correct without going over any of the work you’ve just done.

Next begin refining the details of the face with Slaanesh Grey – be careful not to corrupt your Psi-Titan! Imagine the face as a 3D object and try to think where the highlights would naturally fall. I kept the light direction coming from the top left to match the trim.

Now it’s time to start painting the lion’s mane. This is the scary part as it goes over all of the NMM that you’ve carefully painted. I strongly recommend that you take your time and try to be selective with your positioning. Avoid covering the bright point in the top left, as this feature helps make the NMM look metallic and shiny.

I used watered down Mephiston Red to paint in the eye sockets, this makes the lion look extra angry. You should pick out the eyes in Grey Seer, plus any other details can be finished up in this step.
By this stage everything should be starting to come together. One thing I strongly recommend is to take photos of your piece, and look at those rather than the painted model. The freehand is so small that it’s easy to miss mistakes, but on an enlarged photograph, your mistakes will look massive (and terrible)! This might be a difficult step, but it will be much easier to correct your work.
Once the lion’s complete, it’s time for the symbol to be painted on the forehead. Again, start with black to block in the shape, then use the same colours for the NMM. As this area is so small, you don’t need to bother with Rhinox Hide.
Finally, take one last photograph to check everything on the model and then give the whole panel a coat of matte varnish.